Arranging picture frames on a wall is more than just hanging art—it’s about creating a story, a mood, or a memory that brings life to your living space. Whether you’re working with family photos, artwork, or a mix of both, crafting the perfect gallery wall layout takes planning, creativity, and a touch of inspiration.
In this guide, we’ll walk you through everything you need to know about arranging picture frames—from choosing the right wall to using tools and templates. We’ll also introduce you to print og rammer billedrammer, a helpful option for printing and framing art that adds a professional touch to your display.
Why a Gallery Wall Matters
A well-curated gallery wall serves as a focal point in any room. It brings personality, warmth, and dimension to blank walls. Whether you’re aiming for a minimalist Scandinavian look or an eclectic mix of styles, the way you arrange your picture frames can transform a space.
Before you start hammering nails into the wall, it’s essential to plan your layout and consider the purpose behind the display. Are you telling a story through photographs? Do you want to showcase travel memories or family portraits? Or maybe you’re building an art-focused display using print og rammer?
Step 1: Choose the Right Wall
Not all walls are equal when it comes to hanging picture frames. Consider the following when selecting the perfect spot:
- Visibility: Choose a wall that is frequently seen—hallways, above the couch, staircase walls, or dining areas.
- Lighting: Natural or artificial light enhances the visibility and ambiance of your gallery.
- Wall Space: Ensure there’s enough space for a balanced layout. Avoid overcrowding small walls with too many frames.
Step 2: Decide the Type of Gallery Layout
Before you pick up a hammer, visualize how you want your gallery to look. Here are some popular layout types:
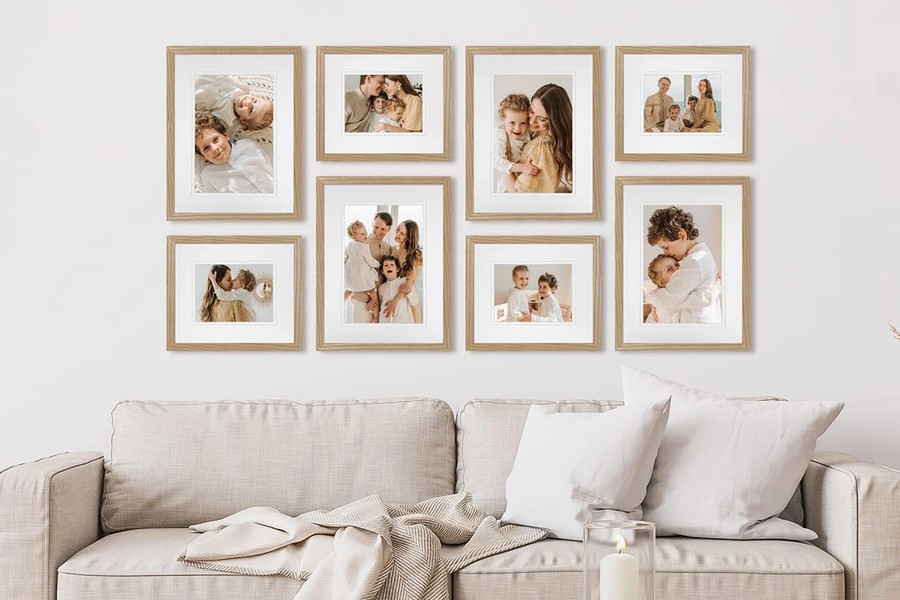
1. Grid Layout
Perfect for a clean, uniform look. This symmetrical style is ideal for photos that are similar in size and shape.
2. Salon Style / Eclectic
This is a more relaxed, artistic arrangement with different-sized frames placed around a central anchor piece. It works well for varied art collections.
3. Linear Layout
Frames are hung in a straight horizontal or vertical line. Great for hallways or above furniture like beds and sofas.
4. Thematic Layout
Arrange photos by theme—family, travel, abstract art—and use print og rammer to create a consistent frame style that ties them together.
Step 3: Measure and Plan Your Space
Grab a measuring tape and painter’s tape—it’s time to mark your wall. Here’s how to plan:
- Measure the entire wall or section where you want to create the gallery.
- Use paper templates of your frames (cut from newspaper or brown kraft paper).
- Tape the templates to the wall using painter’s tape.
- Adjust spacing and alignment until the layout looks balanced.
Pro Tip: Keep at least 2–3 inches between each frame for visual breathing room.
Step 4: Choose Your Frames
Your choice of frames will either blend the gallery or make each piece stand out. Here are a few framing tips:
- Color Palette: Choose a consistent frame color for harmony or mix colors for a more dynamic effect.
- Material: Wooden frames for a rustic feel, metal for modern style, or ornate frames for a vintage look.
- Matting: Adding mats around your pictures can enhance presentation and draw the eye inward.
If you’re looking for custom solutions, print og rammer services offer high-quality prints and frames tailored to your preferences, allowing you to maintain consistency in your gallery.
Step 5: Select Your Artwork or Photos
The content you choose is just as important as the arrangement. Here’s how to curate:
- Personal Photos: Family events, vacations, or milestones work beautifully in homes.
- Artwork: Abstract prints, illustrations, and quotes can create a modern art wall.
- Mixed Media: Combine photography, paintings, posters, and even mirrors for an eclectic touch.
Consider getting high-resolution digital prints professionally framed through print og rammer services for a polished, cohesive look.
Step 6: Start Hanging
Once you’re confident in your layout, it’s time to make it permanent.
Tools You’ll Need:
- Hammer or drill
- Nails or wall anchors (depending on wall type)
- Level (a laser level works great)
- Pencil for marking
Hanging Tips:
- Start from the center and work outward.
- Use a level for alignment to ensure straight rows or angles.
- Use proper hanging hardware for frame weight.
- If using adhesive hooks, make sure they support the frame’s weight.
Pro Tip: Don’t rush. Take breaks to step back and evaluate the gallery as it develops.
Step 7: Create Visual Balance
Balance doesn’t always mean symmetry. It means ensuring that your display feels stable and pleasing to the eye.
- Mix large and small frames strategically.
- Distribute color evenly across the gallery.
- Leave enough negative space so it doesn’t feel cluttered.
If you’re unsure, try photographing the paper template layout on the wall before hanging anything. This gives you a visual reference to review and tweak.
Step 8: Enhance with Décor
Don’t limit your creativity to just frames. Add layers of design to elevate the gallery wall.
- Lighting: Use wall sconces, track lighting, or picture lights to illuminate the frames.
- Plants: Place a tall plant or hanging greenery nearby to soften the look.
- Shelves: Floating shelves can add dimension and hold small framed prints or decorative objects.
Combining these elements with your framed display enhances the gallery’s presence in the room.
Step 9: Maintain Your Gallery Wall
Once your frames are up, maintaining them ensures the display stays fresh:
- Dust regularly to avoid dull frames and glass.
- Replace outdated photos to keep it relevant.
- Swap seasonal art pieces for variety.
- Use print og rammer services for quickly updating photos and prints in the same frames.
Benefits of Using “Print og Rammer” Services
Using a print og rammer (print and frame) service offers several benefits:
- Professional Results: High-quality print and frame finishes that elevate your wall.
- Customization: Choose from various sizes, frame styles, and matting options.
- Convenience: Get everything delivered to your door, ready to hang.
- Consistency: Uniform framing creates a polished and coordinated gallery.
Whether you’re decorating a living room, office, or hallway, print og rammer can help you create a designer-level gallery wall without the hassle.
Common Mistakes to Avoid
Here are some pitfalls to watch out for:
- Hanging frames too high or too low (ideal center is about 57-60 inches from the floor).
- Overcrowding the wall with too many frames.
- Not using a level—crooked frames ruin the aesthetic.
- Ignoring frame weight and using weak hanging tools.
Take your time, plan properly, and use the right tools or services like print og rammer to avoid these common mistakes.
Conclusion
Arranging picture frames on a wall is an art that combines structure and creativity. From planning your layout to choosing the right frames and tools, each step plays a vital role in creating a stunning gallery wall.
Whether you’re decorating a new home or revamping an old room, using tools like paper templates, levels, and professional services like print og rammer can elevate your design and bring harmony to your space. Let your walls tell a story—one frame at a time.